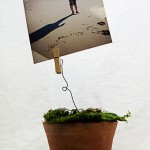
 Betsy Freeman of Bunny in the Blossoms was kind enough to share this handmade flower pot photo display tutorial with us. It’s a good way to make use of old flower pots that your petaled friends have outgrown, and an even better way to show off your favorite photos.
A Note on Materials:
Betsy didn’t include how much of everything because she says, “It really depends on how many of these things you want to make. It also depends on your pot size.” So go ahead and read through the instructions and make your best guesstimate after that.
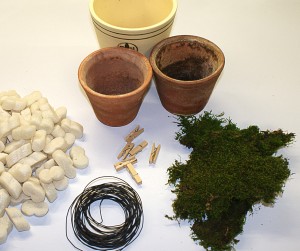
- Flower pots
- Medium thickness crafting wire ( black is best)
- Smallest size clothespins you can find
- Packing peanuts
- Dyed moss
- Hot-glue gun
How To:
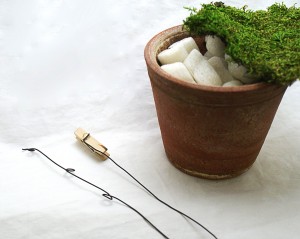
- Fill your flower pot a little over the top with the packing peanuts. Begin heating up your glue gun at this point.
- Tear the moss into a circle just larger (about 1/2 inch) than the size of the circle opening of the flower pot. Put the moss circle over the packing peanuts, and tuck extra between the inside of pot and packing popcorn.
- Cut your wire into lengths twice that of what you want coming out of your pot. Make loops on wire to add flare by grabbing wire with your thumb and forefinger and then bending one side of the wire up and the other down with your other hand.
- Bend the topmost 1/2 inch of the wire to one side.
- Grab your heated up hot glue gun – glue one side of the paper clothespin to the top part of wire that you bent 1/2 inch to the side.
- Stab the bottom wire into the moss that is covering the packing peanuts. You can add more than one of the wires with the clothespin on top if you have a bigger pot.
- Clip on your amazing photography on the top clip! Voila!
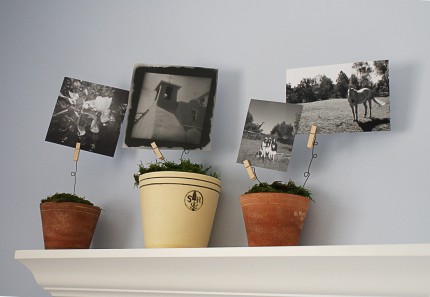
Get creative with it. Display your photos along a single shelf, or break up a workspace.
Check back in and post some pictures of your take on it.
Happy Crafting!


